 Press Coffee
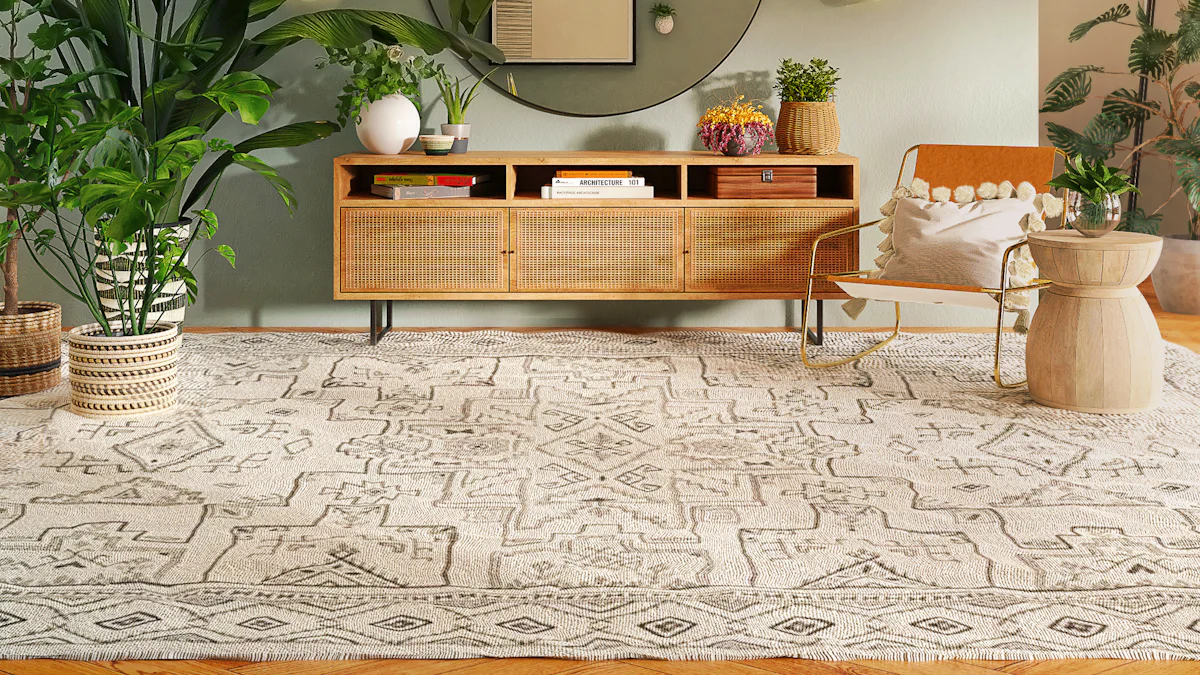
In the realm of Home decor, creating a space that resonates with your personality is key. The beauty of it lies in its ability to transform a house into a home, reflecting your unique style. Embracing simplicity and affordability, one can embark on a journey of creativity and resourcefulness. From the cozy corners of your living room to the tranquil ambiance of your bedroom, these Home Decor Ideas cater to every nook and cranny, promising a touch of individuality in each room.
1. DIY Wall Art
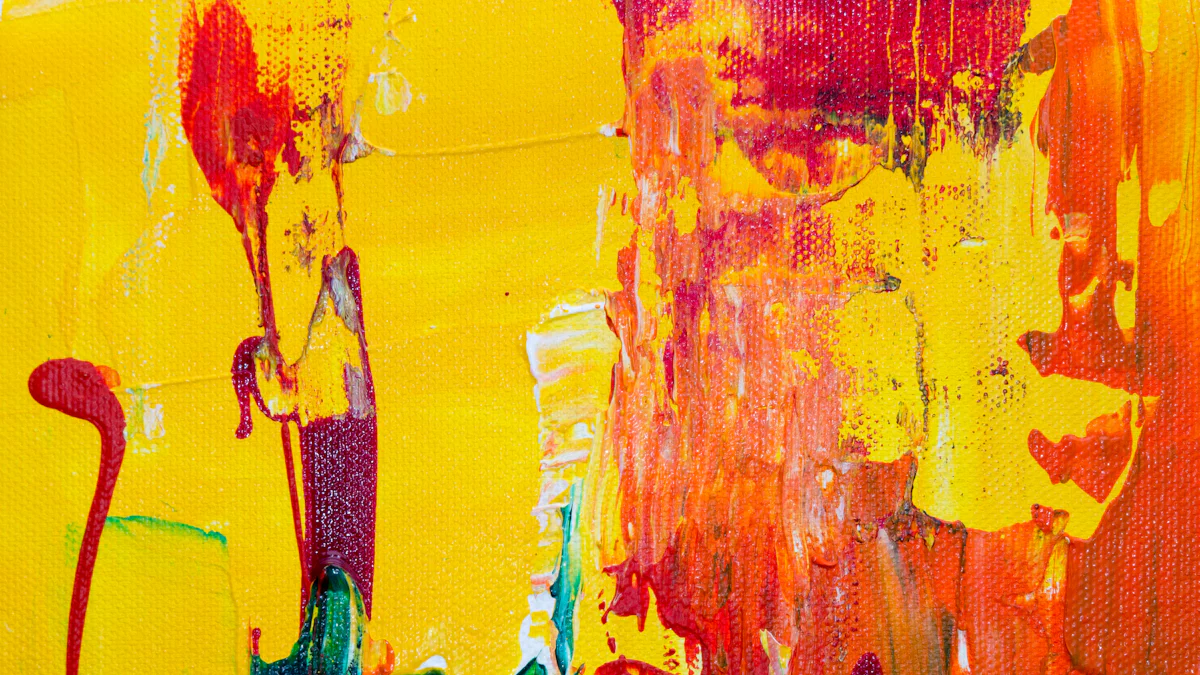
Canvas or paper: Start your DIY wall art project by selecting a canvas or a piece of paper as your base. This can be the foundation for your creative masterpiece.
Paints or markers: Gather your favorite paints or markers to add color and personality to your artwork. Let your imagination run wild with different shades and tones.
Frames: Consider framing your finished artwork to give it a polished look. Frames can enhance the overall presentation of your DIY wall art.
Step-by-Step Instructions
Choose a design or pattern: Begin by deciding on a design or pattern for your wall art. Whether it’s abstract shapes, floral motifs, or geometric patterns, pick something that resonates with you.
Paint or draw on the canvas/paper: Once you have your design in mind, start painting or drawing on the canvas/paper. Experiment with different techniques and styles to bring your vision to life.
Frame and hang the artwork: After completing your masterpiece, frame it elegantly and hang it on your wall. Admire your creativity and showcase your unique DIY wall art to guests and visitors.
Tips for Personalization
Use family photos: Incorporate personal touches into your wall art by using family photos. Displaying cherished memories can make your decor more meaningful and special.
Incorporate favorite quotes: Add inspirational quotes or meaningful phrases to personalize your DIY wall art further. Quotes can uplift spirits and serve as daily reminders of positivity.
2. Repurposed Furniture
Repurposing furniture is not just a trend; it’s a sustainable way to add character and charm to your living space. By giving new life to old pieces, you can create a unique and personalized home decor style that tells a story of creativity and resourcefulness.
Finding Pieces
- Thrift stores: Explore the treasure troves of thrift stores where hidden gems await discovery. From vintage dressers to retro armchairs, you never know what one-of-a-kind piece you might find.
- Garage sales: Uncover potential masterpieces at neighborhood garage sales where preloved furniture is ready for a second chance. Bargaining for that perfect coffee table or bookshelf can be both exciting and rewarding.
- Online marketplaces: Dive into online platforms where sellers offer a plethora of furniture options. Browse through listings, negotiate prices, and have your chosen piece delivered right to your doorstep.
Refurbishing Techniques
- Sanding and painting: Transform worn-out furniture into stunning focal points by sanding away imperfections and applying fresh coats of paint. A splash of color can breathe new life into an old dresser or table.
- Adding new hardware: Elevate the look of your repurposed furniture by swapping out old knobs and handles with stylish new hardware. This simple change can instantly modernize the piece and tie it in with your decor theme.
- Upholstering: Give outdated chairs or sofas a makeover by reupholstering them in vibrant fabrics or elegant textures. Upholstery allows you to customize the look of your furniture while ensuring comfort and style.
For More Stuff Visit Home Decore Ideas
Placement Ideas
- Living room: Create a cozy seating area in your living room with repurposed armchairs or a refurbished coffee table. Mix and match styles for an eclectic vibe that showcases your personality.
- Bedroom: Infuse warmth into your bedroom with repurposed dressers or bedside tables. These unique pieces add character to the room while providing practical storage solutions.
- Entryway: Make a statement in your entryway with repurposed benches or consoles. These welcoming pieces set the tone for your home decor style from the moment guests step inside.
3. Indoor Plants
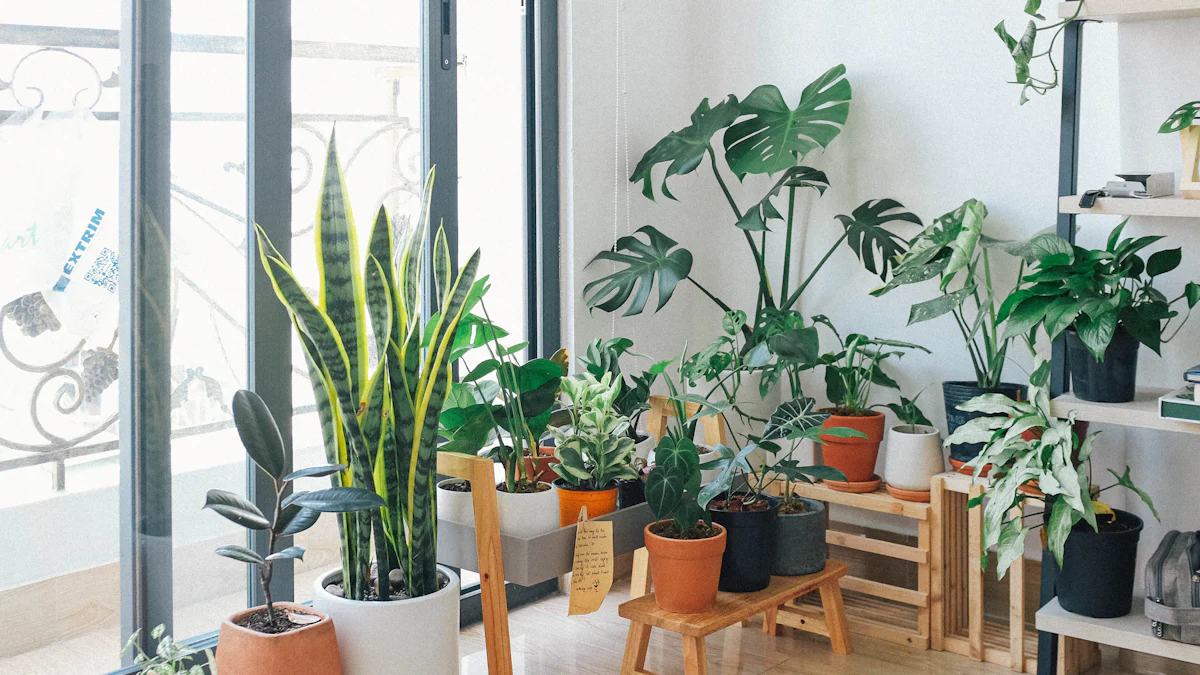
Choosing Plants
Indoor plants are not just decorative elements; they also contribute to a healthier living environment. When selecting plants for your home, consider low-maintenance options that thrive with minimal care. Air-purifying plants are another excellent choice as they help cleanse the air, promoting a fresh and revitalizing atmosphere indoors.
Potting and Display
Enhance the visual appeal of your indoor plants by getting creative with their presentation. Craft DIY planters using recycled materials or unique containers to add a personal touch to your green companions. Opt for hanging planters to introduce vertical interest and save space, or utilize shelving units to create a botanical display that doubles as stylish decor.
Care Tips
Caring for indoor plants involves more than just watering; it’s about understanding their specific needs. Establish consistent watering schedules based on individual plant requirements to ensure optimal growth and health. Additionally, pay attention to the light requirements of each plant, positioning them in areas that receive adequate natural light without direct exposure.
4. Accent Pillows and Throws
When it comes to Accent pillows and throws, they are more than just decorative pieces; they serve as cozy companions that add warmth and style to your living space. Elevate the comfort and aesthetics of your furniture with carefully selected fabrics, textures, and arrangement techniques.
Selecting Fabrics
Patterns and colors
Cushion fabric: Crafted from a variety of fibers, such as cotton, silk, or linen, cushion fabric offers durability and style. Opt for vibrant patterns or soothing hues to complement your existing decor theme.
Throw pillows fabric: Explore a world of textiles with throw pillows fabric sourced from different regions known for their expertise in materials like silk, velvet, tapestry, and linen. Choose textures that invite touch and colors that evoke emotions.
DIY Pillow Covers
Sewing basics
Embark on a creative journey by learning the sewing basics of making pillow covers. From selecting the right thread to mastering simple stitches, sewing your own covers allows you to customize your accent pillows according to your taste.
No-sew options
For those who prefer a quicker approach, consider no-sew options for crafting pillow covers. Utilize fabric adhesives or innovative folding techniques to create stylish covers without the need for a needle and thread.
Arranging Tips
Layering throws
Experiment with layering throws of different textures and sizes to add depth and dimension to your seating area. Mix plush blankets with knitted throws for a cozy look that invites relaxation.
Mixing and matching pillows
Unleash your creativity by mixing and matching pillows in various shapes, sizes, and patterns. Play with contrasts or harmonize colors to create visual interest while ensuring comfort for lounging or napping sessions.
5. Wall Decals and Stickers
Choosing Designs
Themed decals
When it comes to wall decor, themed decals offer a fun and versatile way to personalize your space. Whether you’re a fan of nature, sports, or abstract art, there’s a themed decal to suit every taste. These decals can instantly transform a plain wall into a vibrant focal point that reflects your unique style.
Customizable options
For those seeking a more personalized touch, customizable options provide the flexibility to tailor your wall decor to your preferences. From custom quotes to personalized designs, these decals allow you to showcase your creativity and individuality. With customizable options, you can truly make your walls come alive with meaning and personality.
Application Process
Preparing the wall
Before applying your chosen decals, it’s essential to properly prepare the wall surface. Ensure that the wall is clean and smooth to allow for optimal adhesion. Remove any dust or debris that may interfere with the decal’s application for a seamless finish.
Applying the decal
When it’s time to apply the decal, start by carefully peeling off the backing while avoiding any creases or folds. Gently place the decal on the desired spot on the wall, ensuring proper alignment and positioning. Smooth out any air bubbles using a soft cloth or squeegee for a flawless application.
Smoothing out bubbles
If air bubbles do occur during application, don’t worry! Simply use a gentle hand to smooth out bubbles towards the nearest edge of the decal. By applying light pressure and working methodically, you can eliminate any trapped air without damaging the decal or compromising its appearance.
Removal Tips
Safe removal techniques
When it’s time for a change or if you need to reposition your decals, safe removal techniques are key. Start by gently peeling back one corner of the decal at a time, taking care not to damage the paint or underlying surface. Slowly peel off the decal while applying consistent pressure for a clean removal process.
Reusing decals
To get more mileage out of your decals, consider reusing them in different areas of your home. After removing a decal, store it on its original backing paper in a cool, dry place until you’re ready to redecorate. When reapplying the decal, follow the same application process for effortless reuse and endless decorating possibilities.
6. Upcycled Storage Solutions
Finding Materials
Old crates
Repurposing old crates into storage solutions is a creative way to add rustic charm to your home decor. These versatile containers can be transformed into stylish shelves, unique side tables, or even functional organizers for your living space. By upcycling old crates, you not only reduce waste but also infuse your home with character and individuality.
Baskets
Baskets are not just for storage; they are also decorative accents that can enhance the visual appeal of any room. Whether used for holding blankets in the living room, organizing toiletries in the bathroom, or displaying fruits in the kitchen, baskets offer both functionality and style. Upcycling baskets by giving them a fresh coat of paint or adding decorative touches can elevate their look and integrate them seamlessly into your decor.
Jars and cans
Don’t underestimate the potential of jars and cans when it comes to upcycled storage solutions. These everyday items can be repurposed into charming containers for storing spices in the kitchen, organizing stationery on your desk, or displaying small trinkets on shelves. By upcycling jars and cans with creative labels or decorative elements, you can turn ordinary objects into eye-catching storage pieces that reflect your personal style.
DIY Projects
Painting and decorating
Transforming plain storage containers into personalized masterpieces is easy with a touch of paint and creativity. Whether you prefer bold colors, intricate patterns, or subtle designs, painting and decorating jars, cans, baskets, or crates allows you to customize your storage solutions to suit your taste. Let your imagination run wild as you experiment with different techniques to breathe new life into old containers.
Adding labels
Organizing your home becomes more efficient and visually appealing with the addition of labels to your upcycled storage solutions. Create custom labels for jars and cans using printable stickers, chalkboard paint, or handwritten tags to categorize items neatly. Labeling baskets or crates not only helps maintain order but also adds a decorative element to your storage decor. Personalize each label with unique fonts or designs to make organization fun and stylish.
Organization Tips
Grouping similar items
Maximize the functionality of your upcycled storage solutions by grouping similar items together. Whether it’s organizing spices by category in labeled jars or grouping office supplies in designated baskets, keeping like items together streamlines daily tasks and reduces clutter. Grouping similar items not only enhances efficiency but also creates visually cohesive storage areas that contribute to a harmonious home environment.
Maximizing space
Make the most of every inch of available space by strategically placing your upcycled storage solutions throughout your home. Utilize vertical wall space for hanging baskets or crates as stylish shelving units that double as decor accents. Maximize underutilized areas such as under beds or inside cabinets by incorporating jars and cans for discreet yet functional storage options. By maximizing space with creative placement ideas, you can optimize organization while maintaining a visually appealing aesthetic.
7. Creative Lighting
Lighting plays a crucial role in home decor, setting the mood and ambiance of each room. From cozy corners to vibrant spaces, the right lighting can transform your home into a welcoming sanctuary. Let’s explore some creative lighting ideas that are both affordable and stylish.
Types of Lighting
String Lights
Enhance the atmosphere with string lights that add a warm and magical glow to any room. These versatile lights can be draped along walls, wrapped around furniture, or hung from ceilings to create a cozy and inviting environment.
Table Lamps
Table lamps are not just functional; they also serve as decorative accents that illuminate your space with style. Choose from a variety of designs, shapes, and sizes to complement your decor while providing task lighting for reading or working.
Floor Lamps
Add a touch of elegance with floor lamps that brighten up dark corners and create visual interest in larger rooms. Whether you prefer sleek modern designs or vintage-inspired styles, floor lamps offer both illumination and aesthetic appeal.
DIY Light Fixtures
Mason Jar Lights
Get crafty with Mason jar lights, a charming DIY project that brings rustic charm to your home. Fill Mason jars with fairy lights or LED candles to create whimsical luminaries that cast a soft, enchanting glow in any space.
Paper Lanterns
Elevate your decor with paper lanterns that infuse rooms with warmth and sophistication. Hang paper lanterns of varying sizes and colors to add depth and texture to your lighting design, creating a captivating focal point.
Placement Ideas
Bedroom
Transform your bedroom into a cozy retreat by strategically placing creative lighting elements. Consider bedside table lamps for reading nooks, string lights above the bed for a dreamy ambiance, or floor lamps in dark corners to brighten up the space.
Living Room
Illuminate your living room with creative lighting solutions that enhance comfort and style. Mix and match floor lamps for ambient lighting, incorporate string lights for a festive touch, or showcase unique DIY light fixtures as conversation starters.
Outdoor Spaces
Extend your creativity outdoors by incorporating creative lighting in your outdoor spaces. Hang string lights on patios for al fresco dining ambiance, place lanterns along pathways for added safety and charm, or use solar-powered fixtures for eco-friendly illumination.
8. Gallery Walls
Planning the Layout
When considering a Gallery Wall, selecting a theme is the first step to curating a cohesive and visually appealing display. Whether you opt for a monochromatic color scheme, a collection of vintage frames, or a mix of art styles, choosing a theme sets the tone for your gallery wall. Once you have decided on a theme, arranging frames becomes an exciting puzzle to solve. Experiment with different layouts by mixing frame sizes and orientations until you find the perfect arrangement that complements your space.
Selecting Art and Photos
Personal photos add a touch of nostalgia and personality to your gallery wall. Showcase cherished memories captured in photographs to create an intimate and heartwarming display. In addition to personal photos, incorporating art prints introduces variety and visual interest to your gallery wall. Explore different art styles, from abstract paintings to minimalist sketches, to create a dynamic composition. For added depth and texture, consider including mixed media pieces that combine various artistic elements for a unique and eclectic look.
Hanging Tips
To ensure your gallery wall looks professionally curated, using templates can be incredibly helpful. Create paper templates of your frames and arrange them on the wall before making any nail holes. This allows you to visualize the layout and make adjustments easily. When hanging your frames, always prioritize ensuring level placement for a polished finish. Use a spirit level or simply trust your eye for alignment accuracy that enhances the overall aesthetic appeal of your gallery wall.
9. DIY Rugs and Mats
When it comes to DIY Rugs and Mats, the possibilities are endless. Creating your own floor coverings allows you to infuse your space with personality and style while adding a touch of warmth and comfort underfoot.
Materials Needed
Fabric or old clothes
Transform unused fabric or old clothes into unique rugs and mats that reflect your creativity. Whether you opt for vibrant patterns or soothing colors, repurposing textiles is a sustainable way to add character to your floors.
Non-slip backing
Ensure safety and stability by incorporating non-slip backing into your DIY rugs and mats. This essential component prevents slips and skids, providing a secure foundation for your handmade creations.
Crafting Techniques
Braiding
Embrace the art of braiding to craft charming rugs and mats with intricate designs. Experiment with different braid styles, from classic three-strand braids to more elaborate techniques, to achieve varied textures and patterns.
Weaving
Explore the world of weaving as you create one-of-a-kind floor coverings. From simple loom weaving to hand-weaving techniques, weaving allows you to customize the size, shape, and color of your rugs and mats for a personalized touch.
Sewing
Master the art of sewing as you stitch together fabric scraps or old clothes to form beautiful rugs and mats. Whether you prefer straight stitches for clean lines or decorative stitches for added flair, sewing offers endless possibilities for creative expression.
Placement Ideas
Entryway
Welcome guests in style by placing a handmade rug or mat in your entryway. Create a warm first impression with a colorful rug that sets the tone for your home decor while offering a practical spot to wipe shoes before entering.
Bathroom
Elevate your bathroom decor with a custom-made rug or mat that adds comfort and charm. Opt for moisture-resistant fabrics and non-slip backing to ensure durability in this high-traffic area while infusing your space with personal flair.
Kitchen
Enhance the heart of your home with a DIY rug or mat that combines functionality with aesthetics in the kitchen. Choose materials that are easy to clean and maintain, such as cotton or washable fabrics, for a practical yet stylish addition to your culinary space.
10. Customized Shelving
Customized shelving is a fantastic way to enhance your home decor with both functionality and style. Whether you opt for floating shelves, corner shelves, or ladder shelves, each type offers unique advantages that can transform your living space into a personalized haven.
Types of Shelves
Floating Shelves
Floating shelves are versatile additions that provide a modern touch to any room. These sleek shelves offer a minimalist look, perfect for displaying decorative items, books, or plants without the need for bulky brackets.
Corner Shelves
Utilize the often overlooked corners of your rooms with corner shelves. These space-saving solutions not only maximize storage but also add visual interest to bare walls. Showcase small plants, photo frames, or collectibles on these charming shelves.
Ladder Shelves
Ladder shelves combine functionality and aesthetics in one elegant design. With multiple tiers for storage and display, these shelving units create a striking focal point in any room. Arrange books, vases, or artwork on each tier to curate a visually appealing ensemble.
DIY Installation
Measuring and Marking
Before installing your customized shelving, ensure precise measurements and markings to achieve a balanced layout. Use a level and pencil to mark the placement of each shelf accurately on the wall. This step is crucial for achieving symmetry and stability in your shelving arrangement.
Drilling and Mounting
Once you have marked the positions for your shelves, proceed with drilling pilot holes into the wall at the designated spots. Securely mount brackets or supports for floating shelves or ladder shelves using appropriate hardware. Carefully follow installation instructions to ensure safe and stable shelving.
Styling Tips
Displaying Books
Transform your customized shelving into a literary paradise by showcasing your favorite books in an organized manner. Arrange books vertically and horizontally to create visual interest while adding personality to your space.
Showcasing Decor Items
Infuse character into your home decor by displaying curated decor items on your customized shelves. Mix and match vases, sculptures, candles, or framed art pieces to reflect your unique style and create eye-catching vignettes.
Adding Plants
Bring nature indoors by incorporating plants into your customized shelving arrangements. Choose low-maintenance indoor plants that thrive in various light conditions to add freshness and vitality to your living space. Consider placing trailing plants on higher shelves for added dimension and greenery.
Recap the journey through these Home Decor Ideas that have sparked creativity and transformed spaces affordably. Each idea, from DIY Wall Art to Customized Shelving, offers a unique opportunity to infuse personality into every room. Now is the time to unleash your imagination and bring these concepts to life in your own home. The impact of affordable decor goes beyond aesthetics; it creates a welcoming ambiance that resonates with who you are. Share your decor adventures and let inspiration flow freely!